
Eventos e incidentes
Cada evento con evento aparecerá en el feed del evento. Se puede abrir haciendo clic en la opción Navegación de la barra lateral.

Podrás ver la información previa de cada Evento que incluye:
Icono de tipo de evento: determinado por el tipo de evento que está creando.
Nombre del evento: se crea un nombre automático para el evento según el tipo de evento y se puede configurar en Detalles del evento.
Hora de creación: la hora en que se informó el evento.
Prioridad: la prioridad del evento.
Fecha y hora del evento: la fecha y hora en que ocurrió el evento, esto se puede agregar manualmente y puede ser diferente o no de la fecha en que se creó el evento.
Saltar a la ubicación: al hacer clic en este botón, el mapa le llevará a la ubicación exacta en la que se informó el evento.
Para ver y editar eventos creados previamente, deberá seleccionarlos del feed y aparecerá una nueva ventana con los detalles.
Detalles
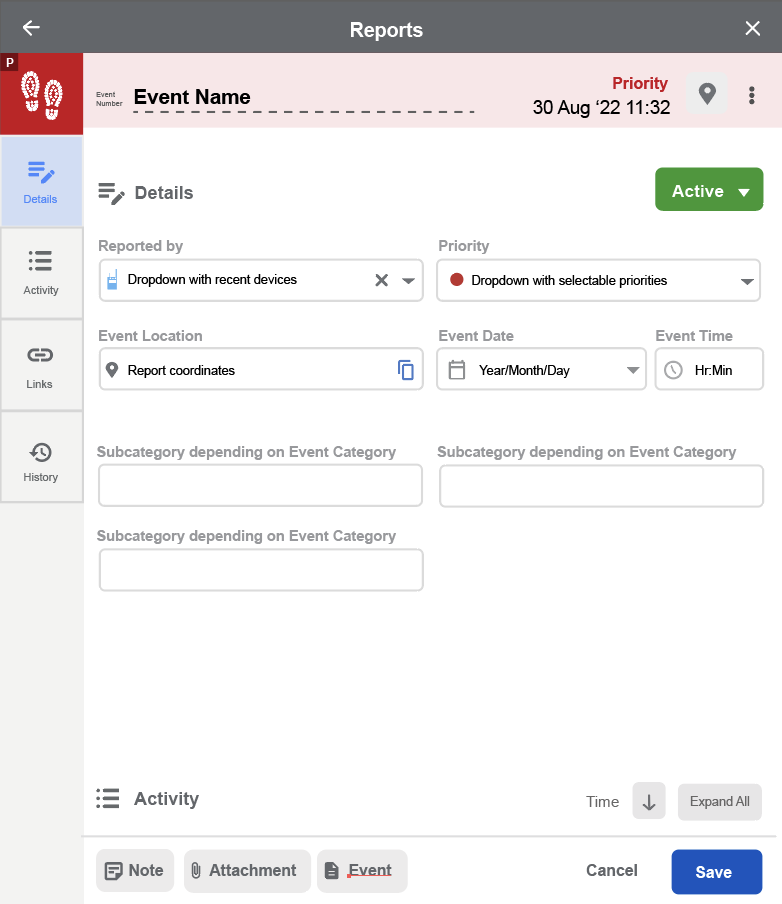
Cada tipo es diferente e incluye un conjunto diferente de Detalles del evento según los requisitos del evento; sin embargo, la misma estructura para cada ventana de Detalles del evento es la misma.
- Nombre del evento: este es el nombre predeterminado del evento según el tipo de evento; se puede editar una vez que se hace clic en él en la ventana Detalles del evento.
- Prioridad: esto se define al crear el evento y determinará el color del evento.
- Saltar a ubicación : esta funcionalidad muestra la ubicación exacta en el mapa donde se encuentra el evento.
- Fecha y hora del evento: esta es la fecha y hora específicas en que se creó el evento.
- Ubicación: la ubicación del evento se puede determinar de varias maneras, incluida la ubicación del dispositivo en el que se creó el evento, la ubicación del marcador en el mapa, las coordenadas exactas y las áreas del evento.
- Agregar a : puede crear incidentes y eventos de tareas agregándolos directamente aquí.
- Estado: podrá determinar el estado del evento, puede ser Activo o Resuelto.
- Detalles: podrá agregar la información relevante para el evento, como quién informa el evento, la prioridad y la ubicación. Según las diferentes Categorías de Eventos, algunos menús desplegables pueden variar.
- Actividad - Podrás agregar los diferentes archivos adjuntos y notas a cada Evento para tener toda la información necesaria. Aquí es donde se mostrarán y podrán editarse.
- Enlaces - Podrás encontrar enlaces que están relacionados con el Evento seleccionado, como Asignaciones e Incidentes.
- Historial: aquí podrá ver cualquier actividad relacionada con el evento, como personas que agregan eventos a incidentes, adjuntan imágenes o actualizan el estado.
- Añadir la nota - Opción de agregar información adicional al Evento.
- Agregar archivo adjunto: adjunte información al evento.
- Añadir evento - Esto abrirá la ventana de informe Nuevo evento y le permitirá crear múltiples eventos.
Puede compartir su evento con cualquiera que tenga acceso a su sitio EarthRanger copiando la URL del evento que desea compartir.
Actividad
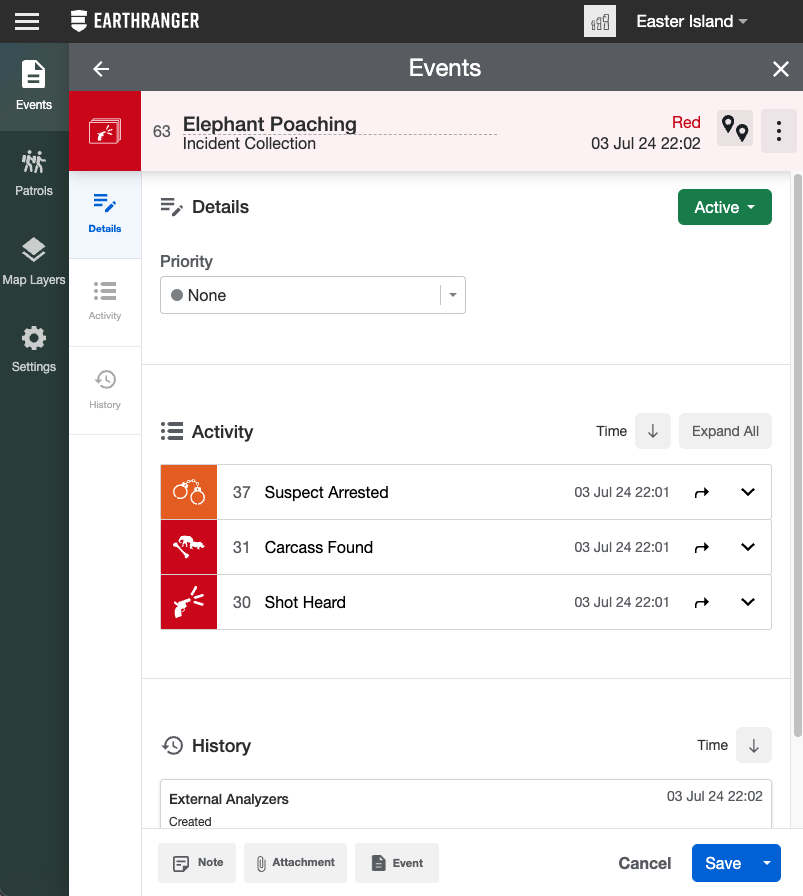
Para agregar toda la información necesaria a su Evento puede agregar notas, archivos adjuntos y Eventos. Agregar un evento a un evento creará automáticamente una nueva colección de incidentes. La sección Actividad de un Incidente muestra una cronología de Eventos, notas y archivos adjuntos tal como se crearon. La sección Actividad de un evento mostrará notas y archivos adjuntos agregados al evento.
Toda la actividad se enumerará mostrando primero la entrada más reciente. Puede cambiar el orden a cronológico haciendo clic en el botón de flecha junto a la hora. Las actividades se pueden ampliar para mostrar más información haciendo clic en "expandir todo" o en la flecha al lado. La información mostrada y las acciones que puedes realizar dependerán del tipo de actividad. Las notas se pueden ampliar para ver la nota completa y editarla. Los archivos adjuntos de imágenes se pueden expandir para mostrar una vista previa de la imagen o una vista de pantalla completa de la imagen donde puede descargarla. Los eventos se pueden expandir para mostrar una descripción general del evento o puede ir directamente al evento en sí.
Historia
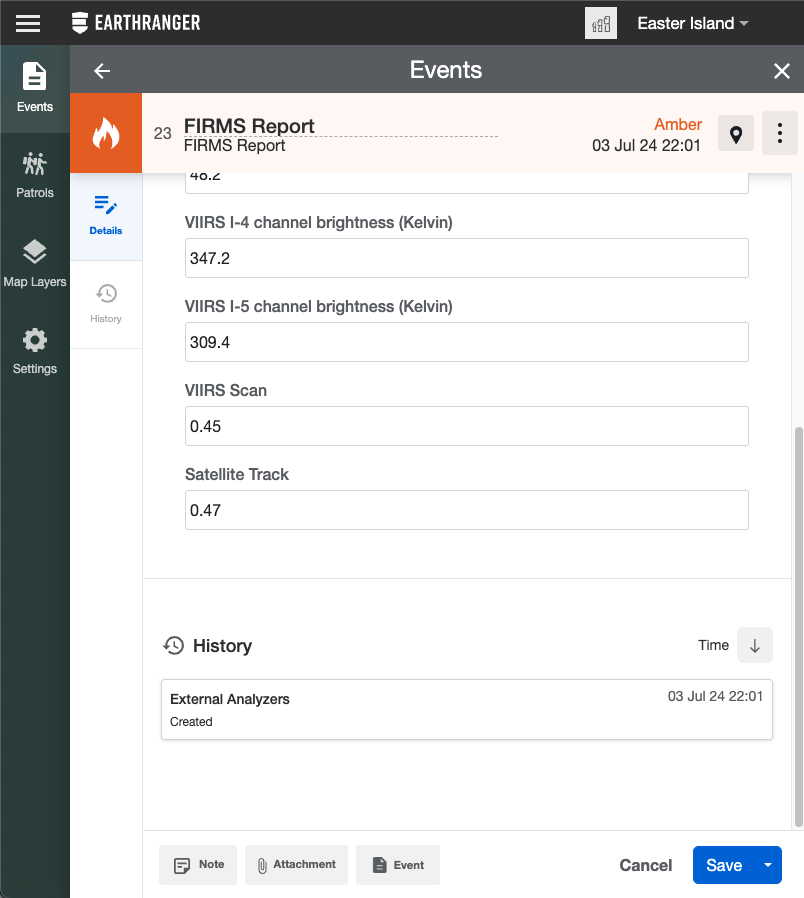
Aquí podrá ver cualquier cambio en el Evento, como personas que agregan Eventos a Incidentes, adjuntan imágenes, actualizan el estado o editan información.
Incidentes
Los incidentes son la colección de eventos que ocurrieron sobre el mismo tema relacionado. Para crear Incidentes, los Eventos deben crearse individualmente primero y antes de guardarlos puede agregar más Eventos en la parte inferior de la ventana del Evento.
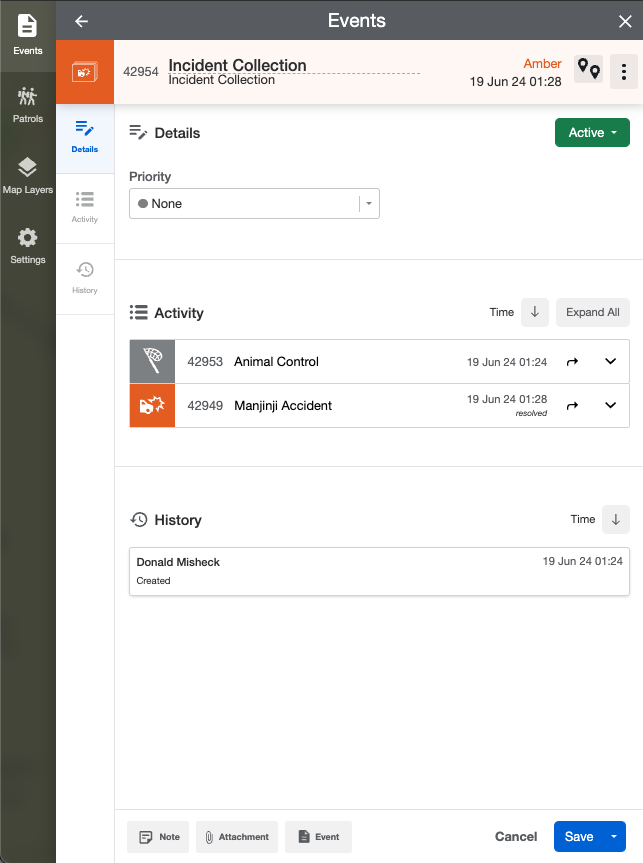
Puede identificar incidentes en el feed de eventos ubicando el ícono.  .
.
Al igual que con los Eventos, cuando abre Detalles del incidente, puede modificar el Nombre de la recopilación del incidente, ajustar la prioridad, resolver el incidente y agregar notas, archivos adjuntos y otros Eventos para incluirlos en el Incidente.
En la sección Actividad, puede ver los Eventos adjuntos al Incidente. Tiene la opción de ampliar los detalles de cada Evento en la pantalla o ir al Evento haciendo clic en las opciones al lado del nombre del Evento.