EarthRanger Events Feed
Every Event will appear on the EarthRanger Events feed. It can be opened by clicking on the Events button in the side bar navigation. From here, you can see a feed of all Events created in EarthRanger.

Events in the Events Feed
Each Event features as a notification with a preview of information including:
- Event Type icon - Determined by the type of Event.
- Event Name - An automatic name for the Event, created based on the Event type (it can be edited from by clicking on to access the Event Details).
- Time Created - The time the Event was reported.
- Priority - The priority level (hierarchy) of the Event.
- Event Date and Time - The date and time the Event occurred. This can be added manually (and may or may not be the same as the time the Event was created, Time Created)
- Jump to Location - Clicking this icon will jump your map view to the exact location the Event was reported.

In order to view and edit a previously created Event, select one from the Event feed. A new window will appear with the details for that Event.
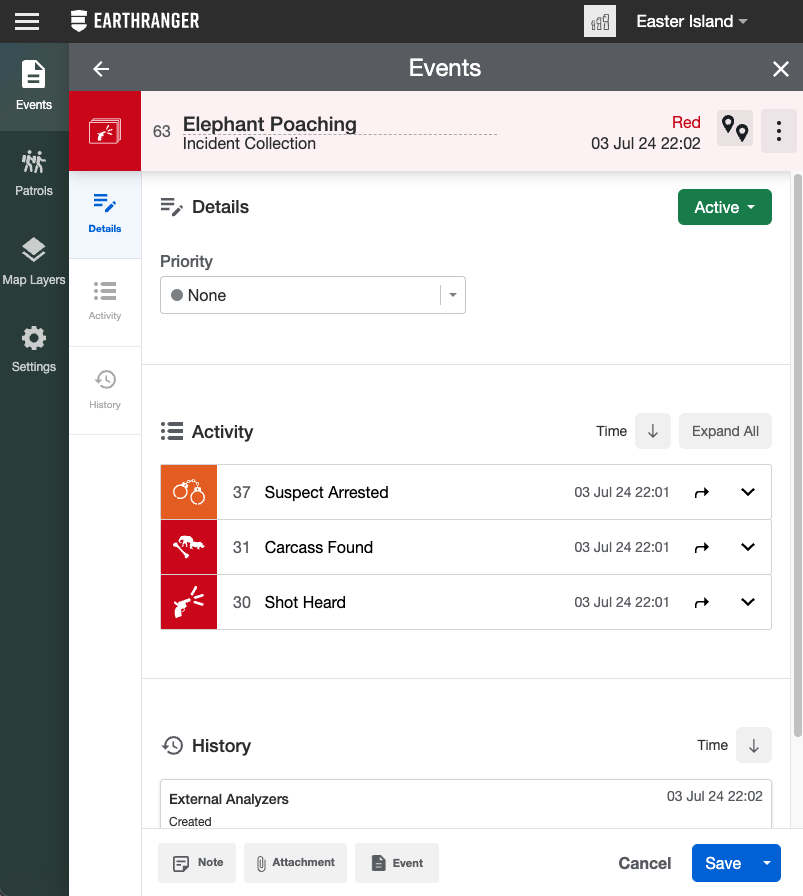
Anatomy of an Event
Once an Event has been opened from the Events Feed or from the Map View, all the details relating to that Event will be shown.
Section: Event Details
Every Event Details window has the same basic structure. Each Event type can be customized to also include a different set of custom fields depending on the requirements of the Event.
- Event Name - This is the default name of the Event based on the Event type; it can be edited if clicked on from the Event Details window.
- Priority - This is set upon creation and determines the color of the Event in the feed and on the map (icon).
- Jump to location - Clicking this icon will jump your map view to the exact location the Event was reported.
- Date and Time of the Event - This is the specific date and time the Event was created.
-
Location - Coordinates associated with this Event. This can be set in several ways including:
- The location of the device that created the Event
- A map marker location selected from the map
- Coordinates (from manual input)
- Event areas
- Add to - Create Incidents and Assignment Events by adding them directly here.
- Status - The status of the Event, can be Active or Resolved.
- Details - You will be able to add the relevant information for the Event such as who is reporting the Event, the priority, and location. Some dropdowns may vary depending on the associated Event Category.
- Activity - You can add attachments (e.g. images, files) and notes to each Event. These will be displayed (and can be edited) from the Activity feed at the bottom of the Event Details window.
- Links - If present, you can see links that are related to the selected Event, such as Assignments and Incidents.
- History - Here you will be able to see historical activity for the Event such as creation time and date, edits to the fields, Events added to Incidents, attachments added, or updates to status.
- Add Note - Option to add additional text information to the Event.
- Add Attachment - Attach files (including images) to the Event.
- Add Event - This will prompt the New Event window, allowing you to create multiple Events and combine them into an Incident.

You can share your Event with anyone who has access to your EarthRanger site by opening the Event Details window and copying the URL in the address bar, or by selecting Copy Event Link from the menu.

Section: Activity
Adding Information to an Event
- You can add notes, attachments, and additional Events.
- Adding an Event from within an Event automatically creates a new Incident Collection.
Activity Sections
- Incident Activity: Displays a timeline of Events, notes, and attachments as they were created.
- Event Activity: Displays notes and attachments specific to that Event.
Activity List Order
- Activities are listed with the most recent entry first.
- To change to chronological order, click the arrow button next to the time.
Expanding Activities
- Click “expand all” or the arrow next to an activity to show more information.
- The available details and actions depend on the activity type.
Details for Specific Activities
- Notes: Expand to view the entire note and edit it.
- Image Attachments: Expand to preview the image or view it full screen for downloading.
- Events: Expand to see an overview or navigate directly to the Event.
Section: History
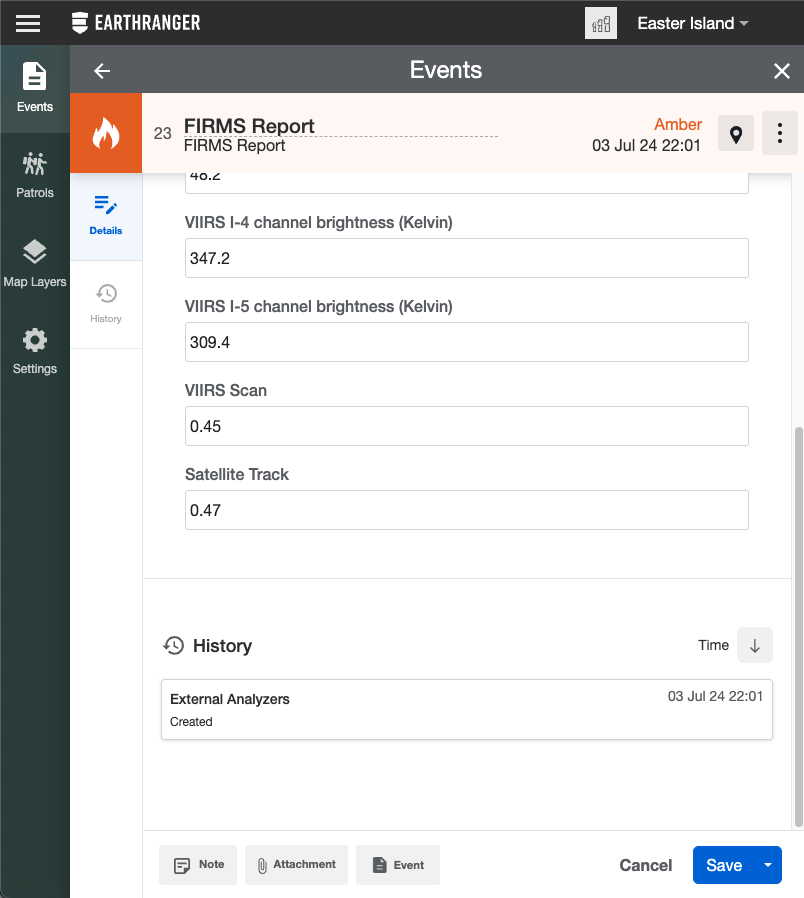
- Any edits / changes made to the Event, will be recorded in the History along with the user making the edit.
- e.g. adding Events to Incidents, attaching or removing files (e.g. pictures), updating status, or editing any of the individual fields.
Incidents
- Incidents are collections of Events (like nested Events).
- There are several ways to create an Incident.
Create an Incident when creating a new Event
- When creating an Event (or after creation), click on the Event button at the bottom of the Event Details page.

- This will open a new Create Event dialogue. Once completed and saved, this new Event will be associated with the original in an Incident.
Create an Incident from existing Events
- Select an individual Event from the Event feed.
- Open the menu (3 dots on the right) and select Add to Incident.

- Select an existing Incident or create a new one by clicking the blue Add to new incident button.

- Both of these methods will result in an Incident collection being created

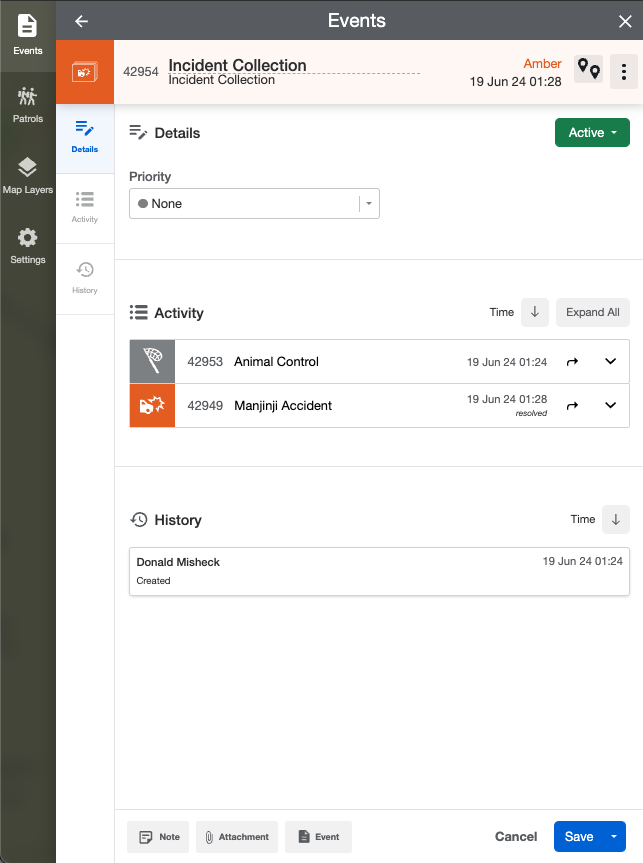
- You can identify incidents on the Events Feed by locating the icon:

- Just like with Events, when you open Incident Details, you can modify the Incident Collection Name, adjust the priority, resolve the Incident, and add notes, attachments, and other Events to include in the Incident.
- In the Activity section, you can view the Events attached to the Incident.
- You have the option to expand the details of each Event on the screen or go to the Event by clicking on the options next to the Event name.